

")
Question – How To Change IP Address on Ubuntu 18.04 Desktop? Steps to set the static IP address on your Ubuntu Desktop system
Ubuntu 18.04 systems are using netplan instead of older static interfaces. The desktop provides an attractive GUI for working with it. You can easily change or set a static IP address on your Ubuntu system.
For the server edition, you can follow this tutorial to configure IP address on Ubuntu using the command line.
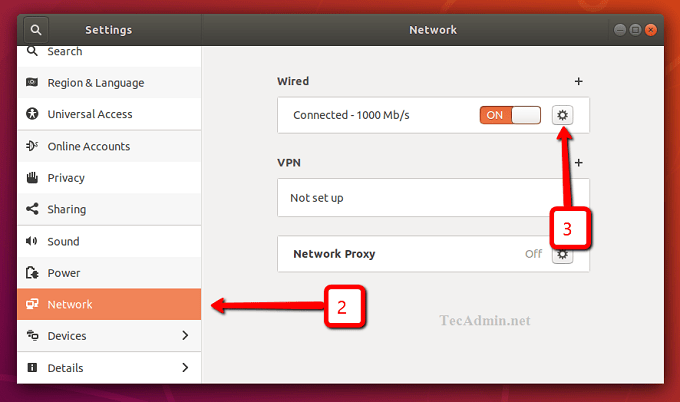
Step 1 – Open Network Settings
Login to your Ubuntu Desktop system. After that open settings windows on your Ubuntu Desktop machine as showing in the below screen.
In the left sidebar click on the Network tab. After that click icon to open setting for your systems network interface as shown in the below screen.
This window will show you the current IP address configured on your system. Now select the IPv4 tab.
Step 2 – Setup Static IP on Ubuntu 18.04
Under the IPv4 Method select the “Manual” option.
Now go to the Addresses section and set your IP Address, Netmask, and Gateway.
You can also set remote DNS IP addresses. If you don’t know what to set here use 8.8.8.8 and 8.8.4.4 as shown in below screenshot.
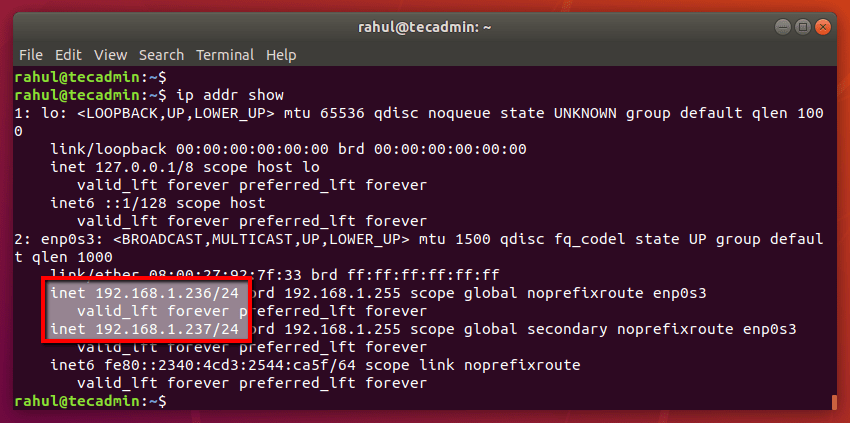
Step 3 – View Current IPs
Press CTRL + ALT + T to launch the terminal on your Ubuntu system. Now type following IP command to view all IP addresses configured on your system.
ip addr show
The post How to Configure Static IP Address on Ubuntu 18.04 (Desktop) appeared first on TecAdmin.
Go to Source
Author: Rahul
Discover more from Ubuntu-Server.com
Subscribe to get the latest posts sent to your email.

