One of the popular free-to-play games on Steam is War Thunder. War Thunder brings a twist to the multiplayer shooter genre by providing advanced ground and aerial combat (in the form of tanks and airplanes).
War Thunder provides a wide range of tanks and airplanes to choose from and customization options to improve the vehicle stats further. This ensures that no two vehicles are the same, and the combat experience feels fresh in every match.
With features like these, we can see why you’d like to play War Thunder.
This guide will cover how you can install War Thunder using Steam. Although there are other methods, you can use to proceed with the installation, working with Steam is the simplest as it gets rid of the process of working with packages.
Step 1: Downloading and Installing Steam
Steam is one of the biggest digital game distributors out in the market these days. It is the go-to place for buying games online and for playing with friends; whatever gaming needs you may have, Steam will most definitely have you covered in every department.
There are two methods to installing Steam on Ubuntu. One makes use of the Command Terminal, while the other makes use of the GUI.
The first way of installing Steam is through the Ubuntu Software Center.
Open the Software Center and type in “Steam”. Click on the first result and press “Install”. Wait for the download to complete, and you should have Steam installed on your system.
The other method is to download and install it through the Command-Line Interface (CLI). To download it through the CLI, type the following command in the Terminal window:
This will install Steam on your system.
Step 2: Updating Steam
When you run Steam for the first time, it will first update itself to the current stable version that is available. This process can take a while.
Step 3: Downloading War Thunder
After you’ve followed the above steps correctly, now all that remains is to finally download the game.
Start by opening Steam. Log into your Steam account or create a new one if you don’t have it. The client will then validate your credentials and transfer you to the store’s front page. From there, you can do many things, such as browse and buy games, manage friends, manage profiles, etc.
Navigate to the Store tab. You should see a window that looks similar to the image below.
In the top-right corner of the screen, type ‘War Thunder’ and click on the first result from the results. Click on the list entry and proceed to the game’s main page. From there, you can see tons of information on the game, such as reviews, system requirements and trailers, etc.
War Thunder is one of the few games that are free to play. This means that it can be downloaded for free and be ready to play. Although there are microtransactions in-game, the game is playable and doesn’t rely on a “pay-to-win” model.
When you click on Play Game, you will be presented with some options before installation. Select the ones relevant to you and click on Next >.
Sit back and relax while your system does everything for you
Once it starts downloading, you can continue to use Steam or your system in general. The download will continue to progress in the background.
In case you have any other game on download before, Steam will proceed to download that game first and place War Thunder in the download queue.
You also have the option to move War Thunder to the top of the queue to download it first. This depends on how much you’re willing to wait.
Once Steam has finished downloading War Thunder, it will launch the War Thunder client.
Step 4: Downloading Remaining Files Through the War Thunder Client
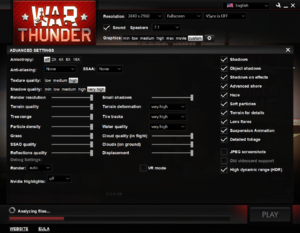
Once launched, the War Thunder client will continue to download the remaining files. This happens because some files are processed through the game’s third-party client, which Steam doesn’t own.
You’ll need to create an account to play the game. This can be done through the in-game client or by going to the official War Thunder website.
Once that’s done, the remaining game files should automatically start downloading. War Thunder will be playable on your system once the download finishes.
You can access the game from your Library in the Steam client.
If you plan to install other games, make sure that the games you install are supported on Linux. To do that, go to the system requirements section and see if there is a tab for Linux OS. A way to make sure that you only search for Linux-based games is by typing ‘Linux’ into the search bar. That way, you will only be presented with Linux-supported games.
Conclusion
We hope this guide helped you in installing War Thunder on Ubuntu using Steam. We covered the methods to install Steam on Ubuntu, along with the process of downloading the game through Steam.
We also discussed how to maneuver through the game client and create a new account for War Thunder. With these, we wish you have a fun experience playing War Thunder on your system.


