Nextcloud provides data access using web interface. It also provides options to sync and share across devices—all under your control. This tutorial will help you to install Nextcloud on Ubuntu 16.04 LTS Xenial Linux operating system.
The first of all, to set up Nextcloud you must have running LAMP server on your Ubuntu 18.04 LTS Bionic system. If you already have running LAMP stack skip this step else use the following commands to install it.
Let’s start with the installation of PHP version 5.6 or higher version on your Ubuntu 16.04 LTS Xenial systems.
wget -q https://packages.sury.org/php/apt.gpg -O- | sudo apt-key add -
sudo echo "deb https://packages.sury.org/php/ stretch main" | tee /etc/apt/sources.list.d/php.list
sudo apt-get update
sudo apt-get install -y php php-gd php-curl php-zip php-xml php-mbstring
sudo apt-get install -y apache2 libapache2-mod-php
sudo apt-get install -y mysql-server php-mysql
After successfully configuring lamp server on your system, Let’s download latest Nextcloud from its official website.
cd /tmp
wget //download.nextcloud.com/server/releases/nextcloud-13.0.5.zip
Now extract downloaded archive under website document root and set up appropriate permissions on files and directories.
cd /var/www/html
sudo unzip /tmp/nextcloud-13.0.5.zip
sudo chown -R www-data:www-data nextcloud
sudo chmod -R 755 nextcloud
Now, remove the archive file.
sudo rm -f /tmp/nextcloud-13.0.5.zip
After extracting code, let’s create a MySQL database and user account for configuring Nextcloud. Use following set of command to login to MySQL server and create database and user.
mysql -u root -p
Enter password:

mysql> CREATE DATABASE nextcloud;
mysql> GRANT ALL ON nextcloud.* to 'nextcloud'@'localhost' IDENTIFIED BY '_Pa$$w0rd_';
mysql> FLUSH PRIVILEGES;
mysql> quit
Access the Nextcloud directory in the web browser as below. Change localhost to your server IP address or domain name.
http://localhost/nextcloud/
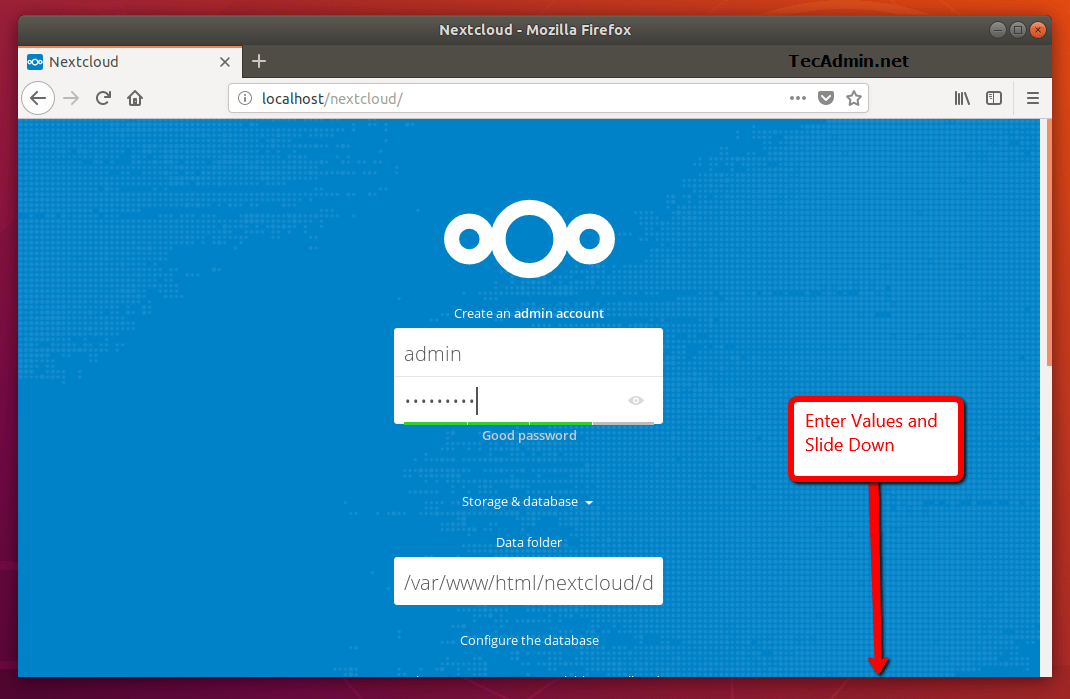
Enter new admin credentials to create an admin account and provide the location of the data folder.
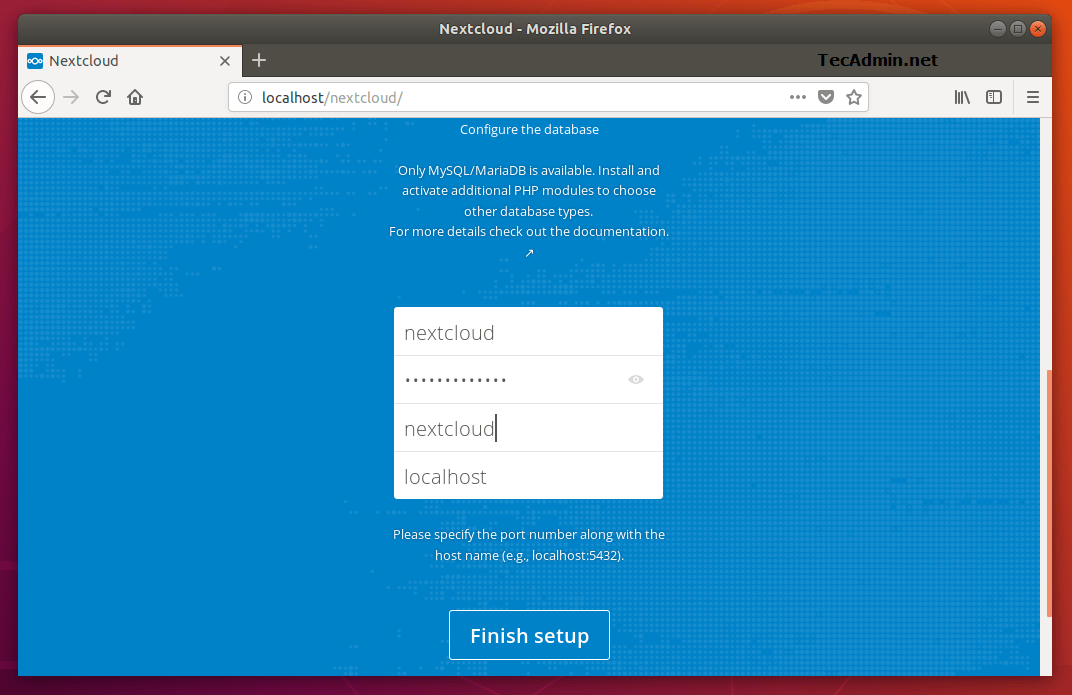
Now slide your page down and input the database credentials and click on Finish Setup.
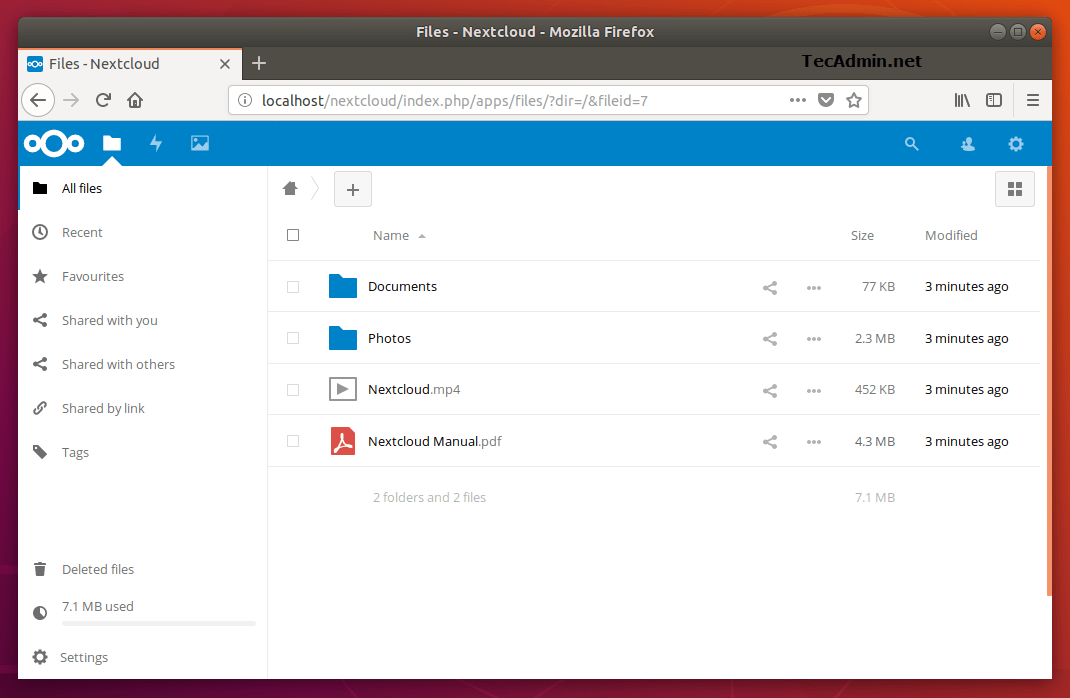
After completing setup you will get admin dashboard. Where you can create a user, groups, assigned them permissions etc.
Congratulations, You have a working Nextcloud instance on your Ubuntu 16.04 LTS Xenial system.
The post How to Install Nextcloud on Ubuntu 16.04 (Xenial) appeared first on TecAdmin.
Go to Source
Author: Rahul
Previously I have written about how useful public cloud storage can be when starting a…
This is Part 2 of the "Karafka to Async Journey" series. Part 1 covered WaterDrop's…
For many software teams, documentation is written after features are built and design decisions have…
With the release of the FIPS 140-3 certified cryptographic modules for Ubuntu 22.04 LTS, Canonical…
Open source libraries are repositories of code that developers can use and, depending on the…
Last year, we had the opportunity to speak at Regent’s UX Conference (Regent’s University London’s…